PVsit classic – Step-by-step instructions –
Roof drawing and module cover
Location: Enter the exact address of your project in the address bar. You can then zoom in even closer to the object using the “+” button or using “Ctrl”+ scroll.
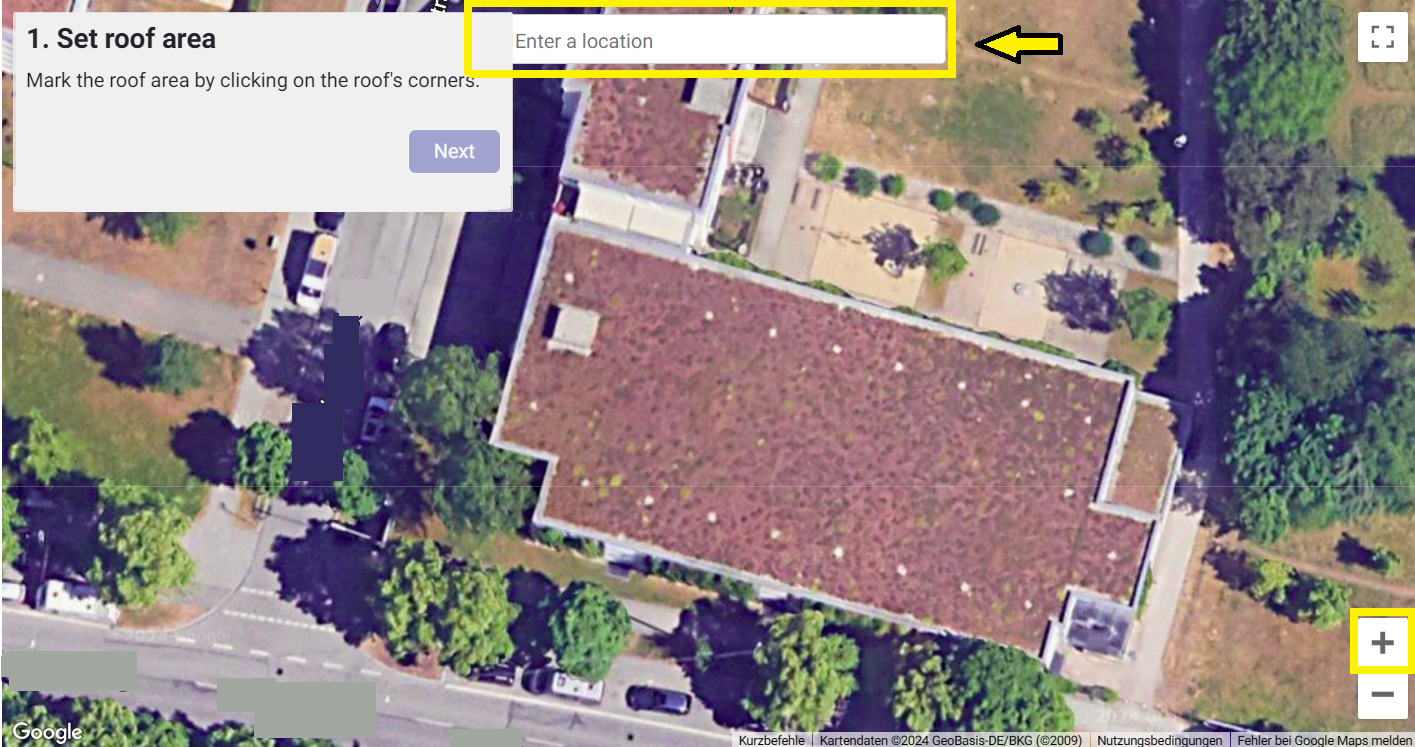
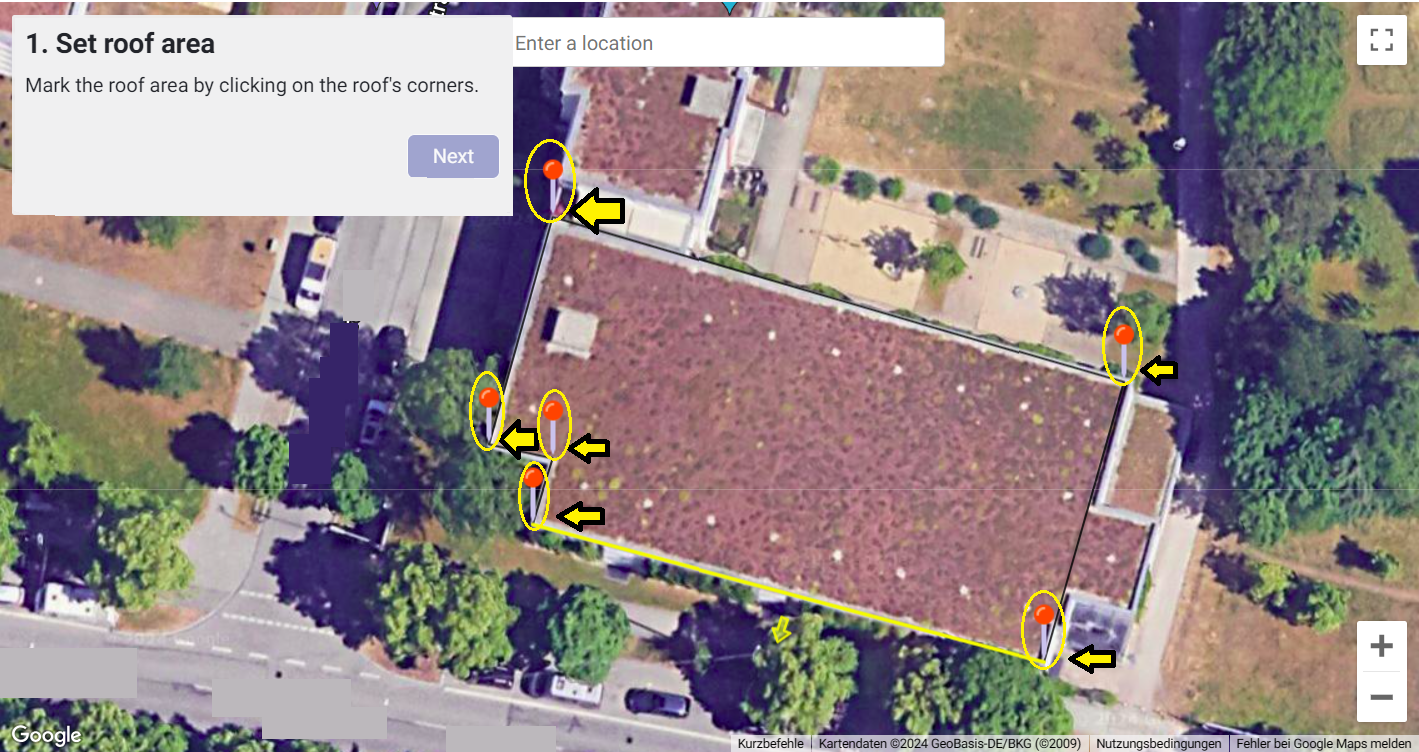
- Roof area Mark the roof area by clicking on the roof’s corners.
Tips:
- You can also move or correct the set roof points later using the mouse.
- Roof points can be deleted by right-clicking.
→ When you have finished defining the roof points, click on “Next”
2. Roof orientation
In this step, the orientation of the roof is determined. The yellow marking of the roof edge is used for this. Depending on the roof type:
- Pitched roof: Please select the lower roof edge (eaves).
- Flat roof: Please select the roof edge, along which the modules will be placed.
To change the marking, click on the “Roof edge” button. This will change the marked roof edge.
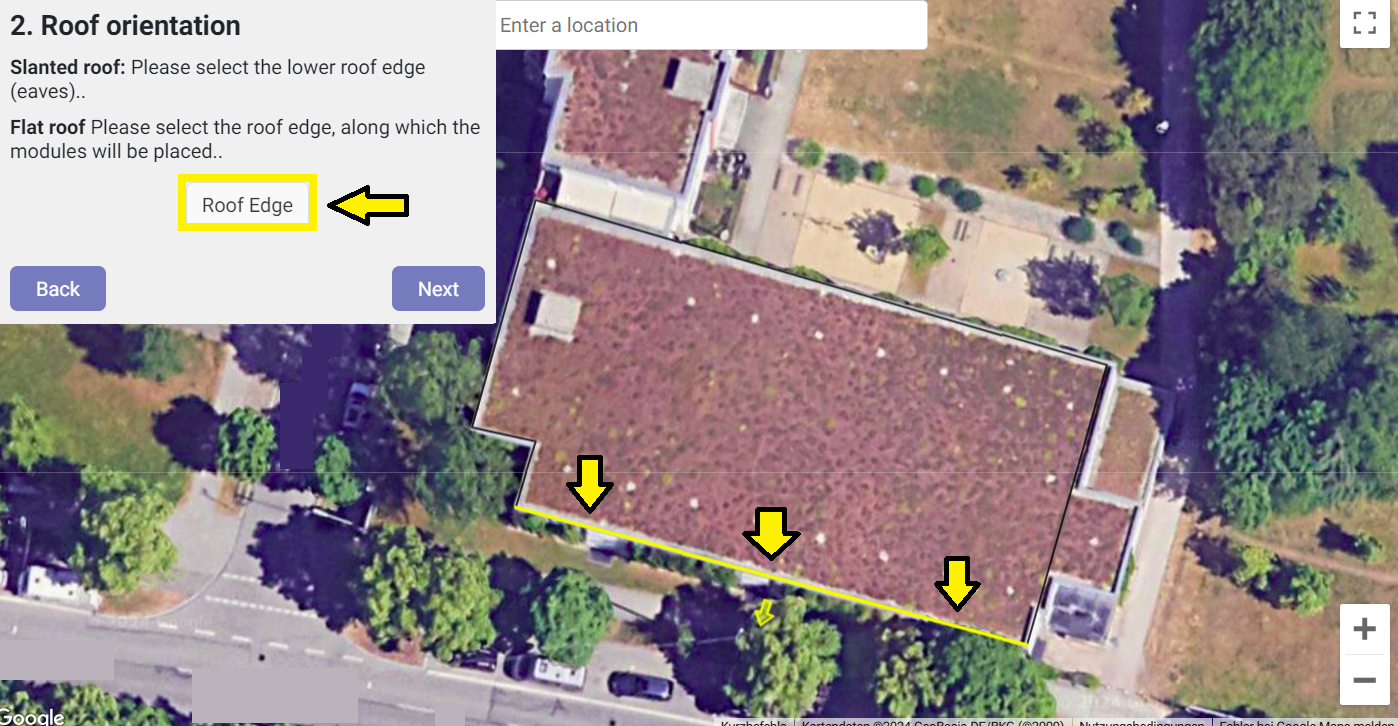
→ Then click on “Next”.
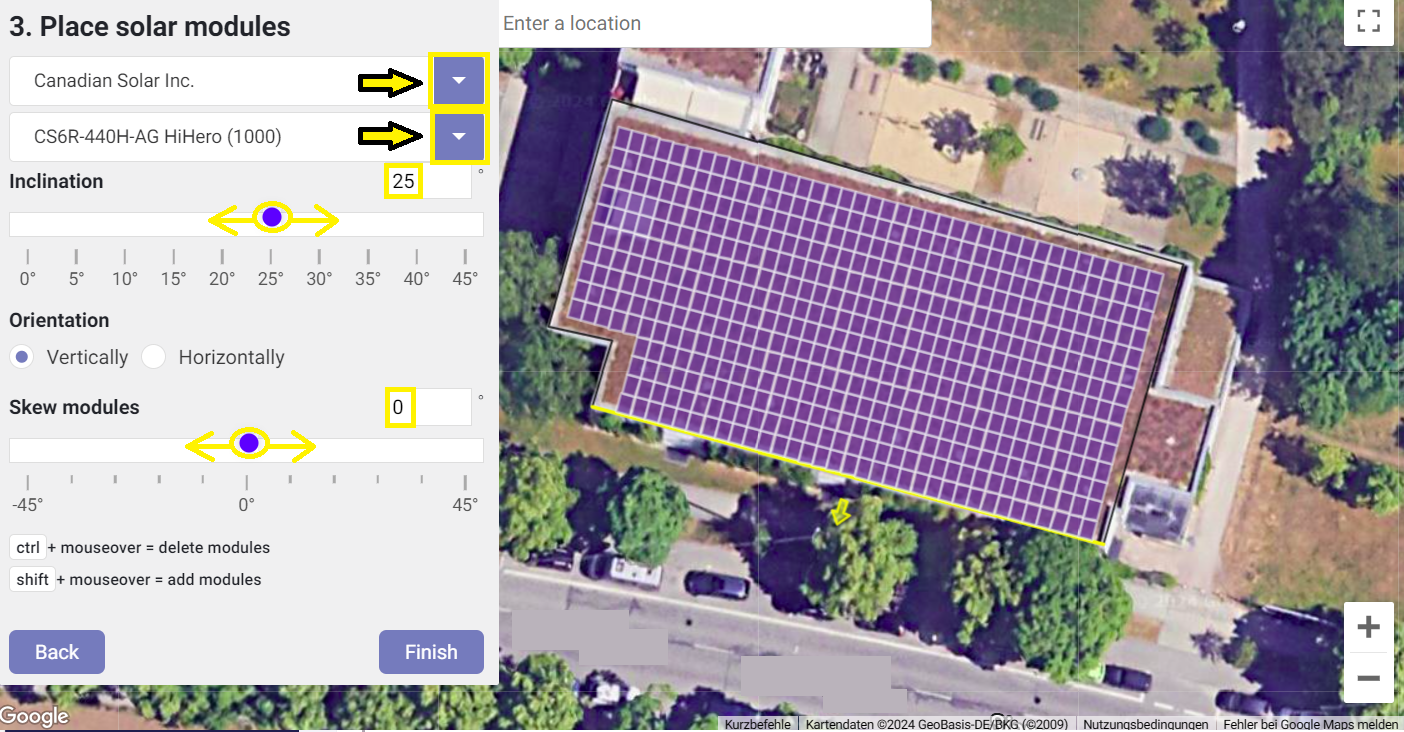
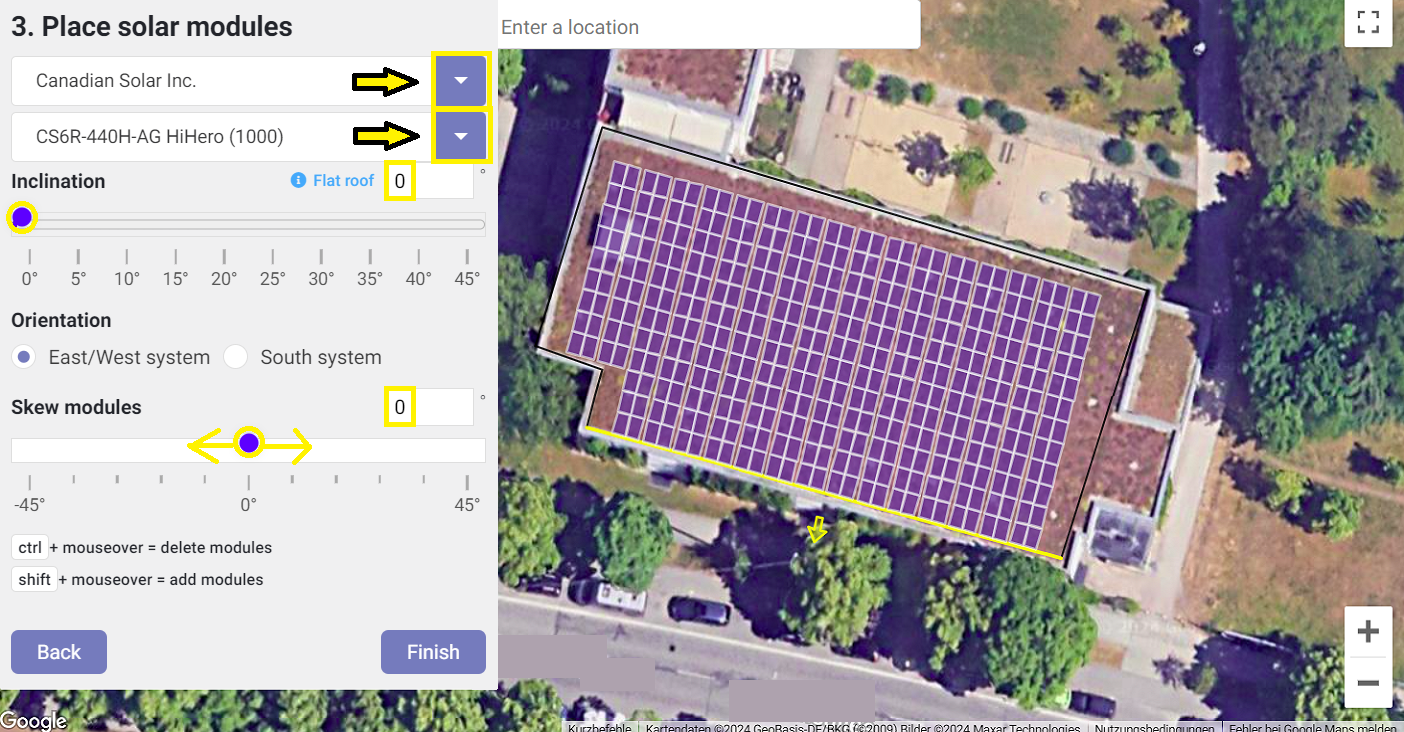
3. Place solar modules
The modules are now placed on the roof. Proceed as follows:
- First select the manufacturer from the database.
- Then select the module from the manufacturer that you want to install.
- Inclination
Pitched roof: For the “Inclination” option, enter the roof inclination in degrees or drag the slider to the desired value.
Flat roof: Enter 0° for “Inclination” here. This automatically adjusts all other options. → The corresponding display of the modules is shown immediately. - Orientation
Pitched roof: Now specify whether you want to cover the modules vertically or horizontally.
Flat roof: Now specify whether you want to cover the modules to an east/west system or a south system.
→ The corresponding display of the modules is shown immediately. - Skew modules:
This function helps you to adjust visual corrections.
→ The corresponding display of the modules is shown immediately.
View pitched roof:
View flat roof:
Tips:
- Delete modules: You can delete individual modules by clicking on the module once. Do you want to delete several modules at the same time? Hold down the “Ctrl” key and move the mouse over the relevant modules.
- Add modules: You can add individual modules by clicking on the corresponding position on the roof. You can add several modules at once by holding down the “Shift” key and moving the mouse over the position on the roof that you would like to add.
→ When the roof planning is complete, click on “Finish”. → If you want to create another roof
→ Click on “Add new roof”
You will then receive an overview and initial evaluations of your project.
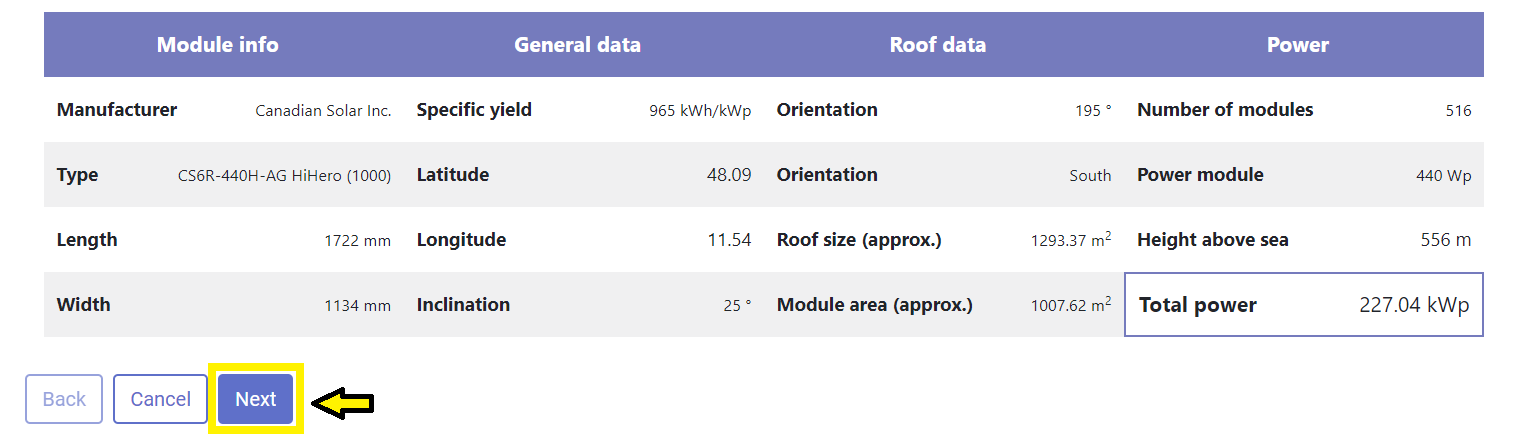
Now click on “Next” to add further data for your project.